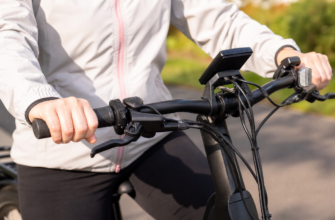
If your brake levers sit too far from the grip, start with the reach-adjust screw on the lever body. Turn it clockwise to bring the blade closer to the bar, until two fingers rest on it with the first knuckle bent. If there is no adjuster, fit short-reach levers.
Checking a specific bike? Our e-bike standover height database lists every published standover figure we can source from manufacturer specs, sorted lowest first — plus the popular models that publish no figure at all.
This is a safety article, not a comfort article. A rider who can only reach the blade with fingertips cannot generate full braking force, and cannot generate it quickly. On a 60-pound e-bike at 20 mph, that gap is the whole margin. Riders between 5’0″ and 5’5″ hit this constantly: levers ship in one position sized for an average adult male hand, and nobody at the factory moved them.
Everything below is standard bicycle mechanics. Where we mention a specific bike, the spec comes from the manufacturer’s own published page — we compare published specifications and do not physically test bikes.
How do I know if my brake levers are too far away?
Sit on the bike in riding position, put two fingers on the lever blade, and look at your knuckles. If your fingers are straight or nearly straight when they touch the blade, the lever is too far. If you have to slide your hand forward off the grip to reach it, it is much too far.
Three checks, in order:
- The knuckle test. Fingers resting on the blade should show a clear bend at the first knuckle. Straight fingers mean you are pulling with fingertip leverage only.
- The grip test. Your thumb and remaining fingers must stay wrapped around the grip while braking. If braking makes you release the bar, the position is unsafe — a bump mid-braking can pull the bar out of your hand.
- The full-pull test. Pull the lever to its maximum. The blade should never contact the grip or your other fingers before the brake reaches full power — that means you run out of travel before you run out of stopping.
Do these seated, with your hands where they actually sit. A cockpit that is too long pulls your torso forward and changes your wrist angle, which alone can make a well-adjusted lever feel wrong — see handlebar reach for petite riders.
Can you adjust brake lever reach on an e-bike?
Usually yes, in two independent ways: rotating the lever on the handlebar, and moving the blade closer with a reach-adjust screw. These are different adjustments and both matter. Rotation sets the angle your wrist works at; the reach screw sets how far your fingers stretch.
What is a reach-adjust screw?
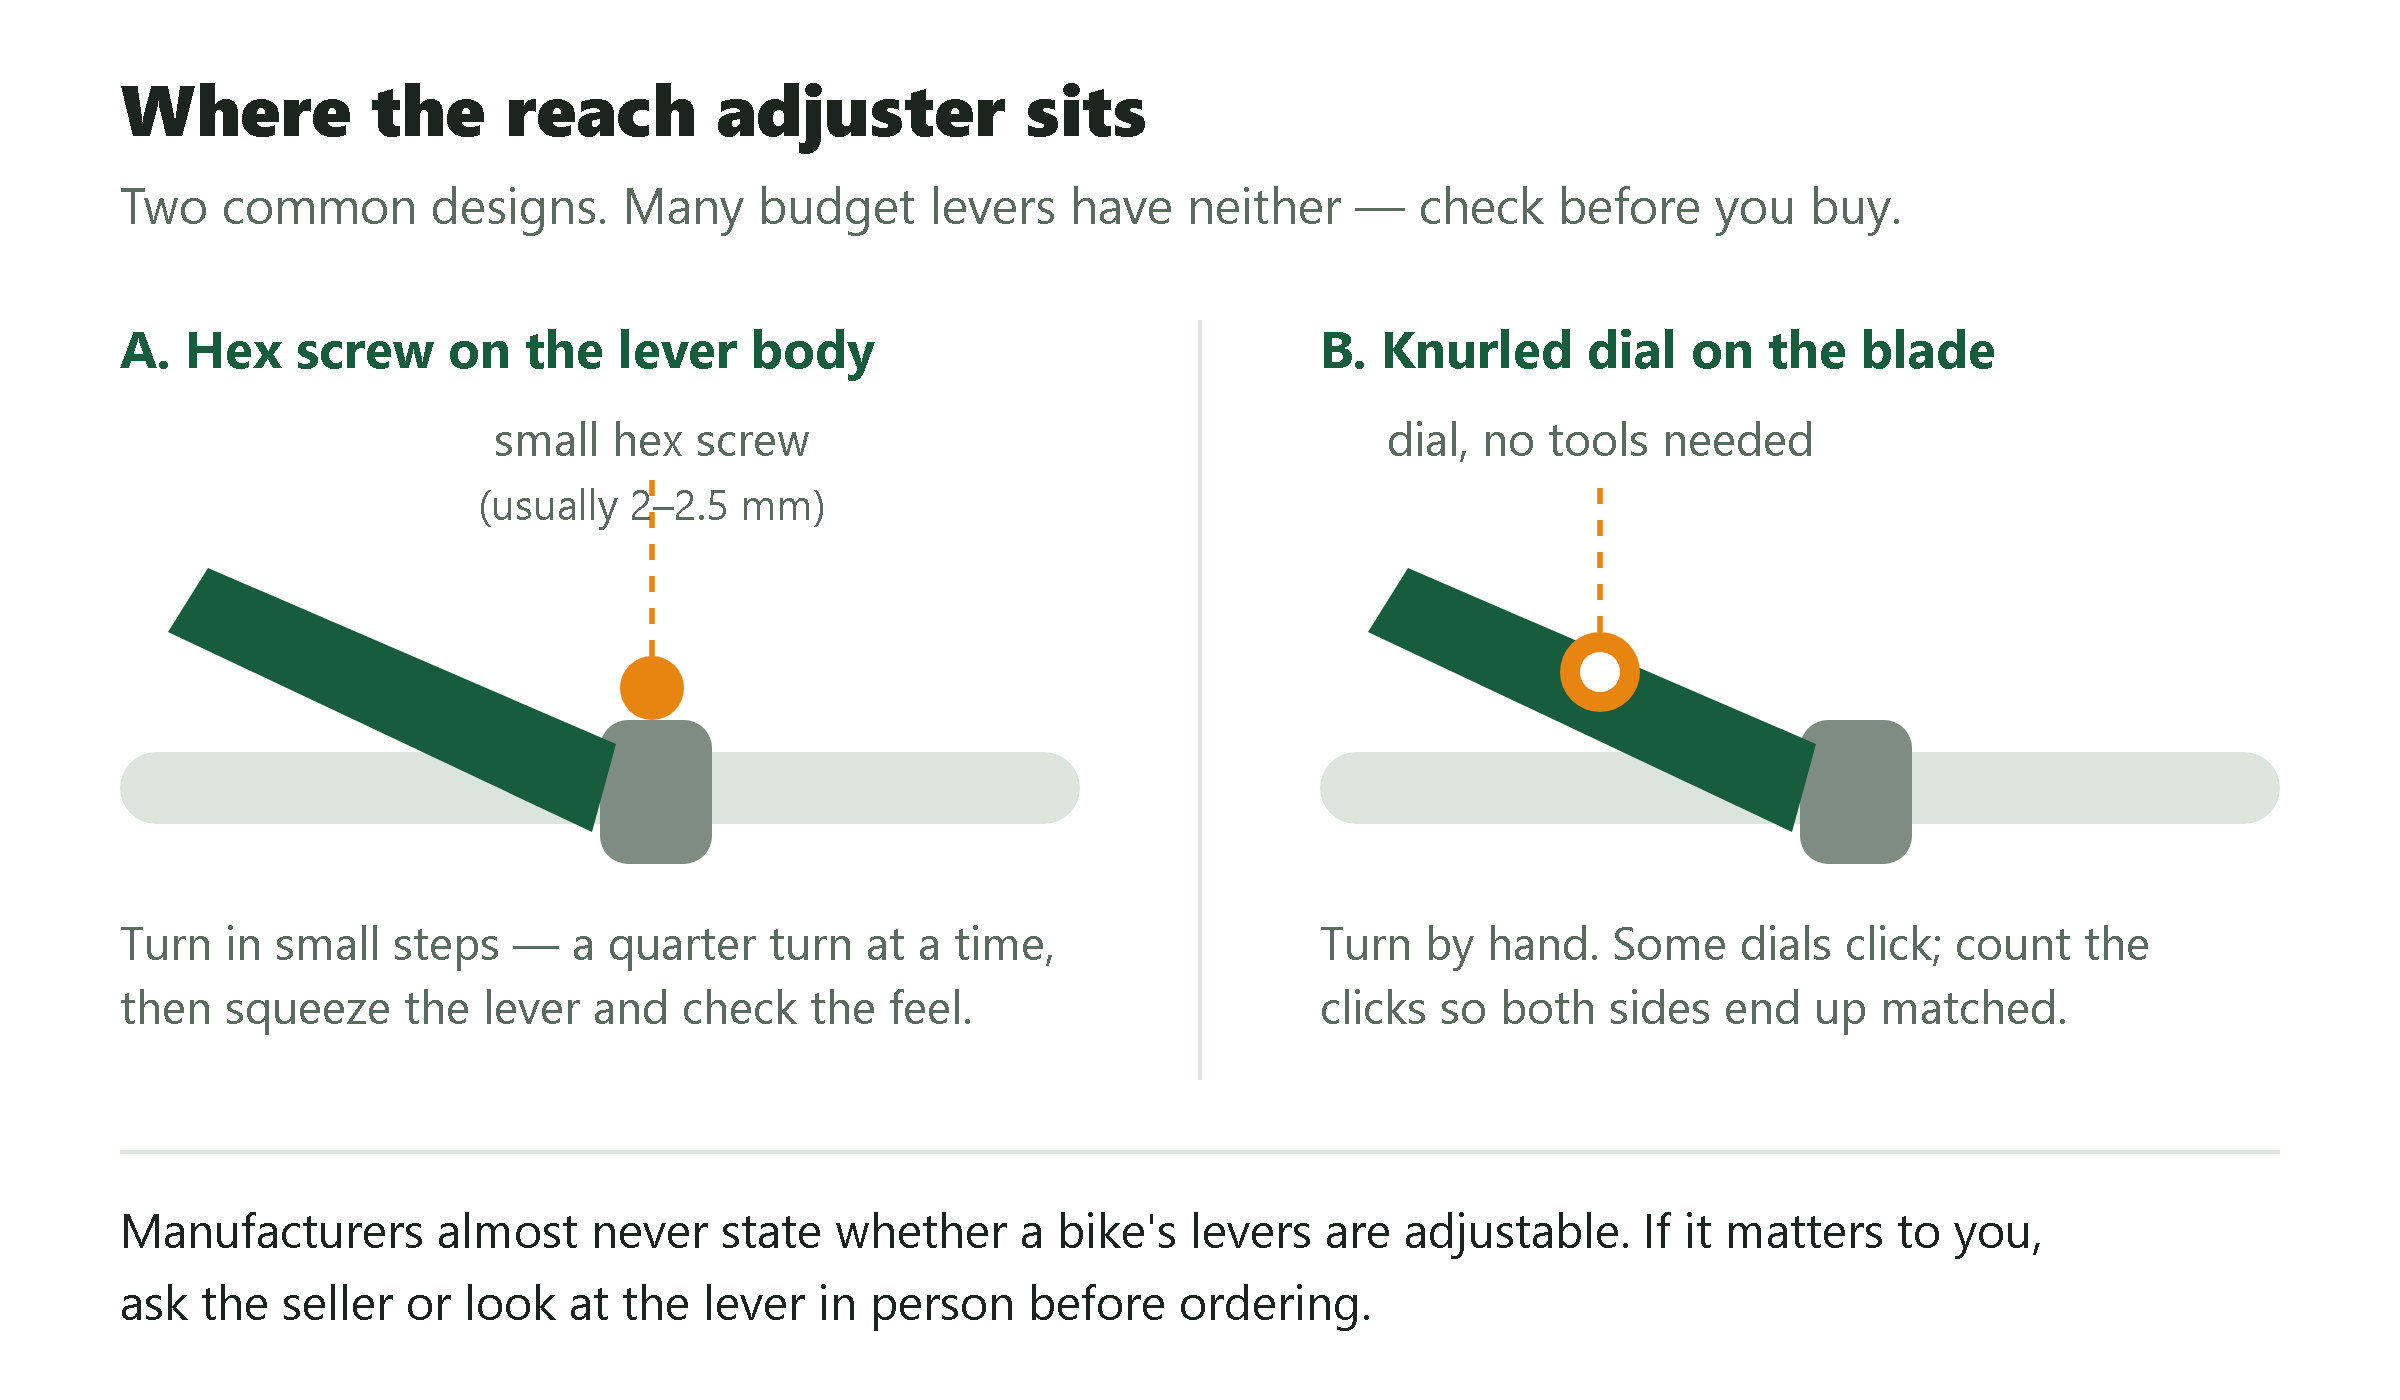
It is a small screw or thumb dial on the lever body, usually facing you where the blade pivots. On hydraulic brakes it is often a 2mm or 2.5mm hex screw; on better levers it is a dial you can turn by hand with no tools. Turning it in moves the blade’s resting position closer to the bar. It changes only the starting position of the blade — it does not change how the brake works.
Step by step: adjusting reach with a screw or dial
- Put the bike on level ground, power off, and sit on it in normal riding position.
- Find the adjuster on the inside face of the lever body, near the blade pivot — a small hex socket or knurled dial. Both levers adjust separately.
- Turn it clockwise a quarter turn at a time to bring the blade closer. Do not force it past its stop.
- Re-do the knuckle test after each quarter turn. Stop when your first knuckle is clearly bent with two fingers on the blade.
- Do the full-pull test. If the blade now hits the grip or your other fingers before the brake bites hard, back the screw out.
- Match the other side — mismatched levers make you brake unevenly under stress.
- Test at walking pace in a safe open space, braking gently first, then progressively harder.
What if there is no adjuster on my levers?
Budget levers, especially basic mechanical disc levers, often ship without any reach adjustment at all. You still have options, cheapest first:
- Rotate the lever on the bar. Loosen the clamp bolt and rotate the lever body down until your forearm, wrist and finger line up straight, then retighten to the torque marked on the clamp. Free, and it often makes more difference than people expect.
- Move the lever inboard. Sliding it a few millimetres toward the stem lets a shorter hand sit further onto the blade for more leverage. Keep the grip and shifter usable.
- Fit thinner grips. A slimmer grip shortens the distance from bar to blade and lets a small hand close fully around the bar. Underrated fix.
- Swap to short-reach levers. The real solution — see below.
- Mechanical brakes only: adjust cable tension. Turning the barrel adjuster out takes up slack so the pads bite earlier in the pull. It does not move the resting blade position. Do not tighten so far that the pads drag.
If you would rather not do this yourself, a bike shop will set levers up in minutes. It is one of the cheapest safety improvements available on any bike.
What is a short-reach brake lever?
A short-reach lever is a lever blade shaped so its resting position sits closer to the handlebar and its power band falls within a shorter finger stretch. Some are sold explicitly as small-hand or junior levers. The blade is often shorter and more curved, so the contact point is nearer the pivot.
Two things to check before buying. First, compatibility: a hydraulic lever is part of a sealed system and must match the brake, and swapping means bleeding it. Mechanical levers pull a cable and are far more interchangeable. Second, check whether your lever contains a motor cut-off switch — most e-bikes cut motor power the instant you touch a brake lever, and that switch lives in the lever. A replacement without it removes that safety feature.
Hydraulic vs mechanical disc brakes for small hands
For a rider with small hands, hydraulic disc brakes are the clear default. They require noticeably less hand force for the same stopping power, and reach adjustment is far more common on hydraulic levers.
| Criterion | Hydraulic disc | Mechanical (cable) disc |
|---|---|---|
| Hand force needed | Low — fluid transmits force with no cable friction. | Higher — cable friction and housing compression mean you squeeze harder. |
| Reach adjustment | Commonly built in, sometimes a tool-free dial. | Often absent on budget levers. |
| Modulation | Better — partial braking is easier to apply smoothly on a heavy bike. | More on/off feel, especially as the cable ages. |
| Consistency | Self-adjusts for pad wear. | Degrades as cables stretch; needs re-tensioning. |
| Maintenance | Little routine work, but bleeding needs tools or a shop. | Easy to service at home, but needed more often. |
| Lever swaps | Must match the system; requires a bleed. | Flexible — most cable levers fit most cable calipers. |
Hydraulic discs are now standard even at the bottom of the market. Among the models on our best e-bikes for short riders list, the Lectric XP4 (from $999), XP Lite 2.0 (from $799) and Ride1Up Portola ($945) all publish 180mm hydraulic discs, and Aventon’s Soltera 2.5, Soltera 3 ADV and Pace 4 all publish hydraulic Tektro brakes. You no longer have to spend up to get hydraulic.
What manufacturers do not publish is lever reach adjustment. Brake brand and rotor diameter appear on spec pages; lever ergonomics do not. We could not find an e-bike brand in this price range that states whether its levers have a reach-adjust screw. You cannot answer this from a spec sheet — you have to inspect the lever or ask the seller before buying. We would rather tell you that than guess.
How to measure your hand span and lever reach
Two measurements, both doable with a ruler in under two minutes. They give you a number to quote a shop instead of “the brakes feel far away.”
Measuring your functional grip reach
- Rest your palm flat on a table, fingers relaxed and slightly curved as if holding a grip.
- Measure from the base knuckle of your index finger to its tip. That is your functional finger length.
- Measure your full hand span: thumb tip to little finger tip, hand stretched wide.
Measuring lever reach on a bike
- Grip the bar normally with the bike stationary.
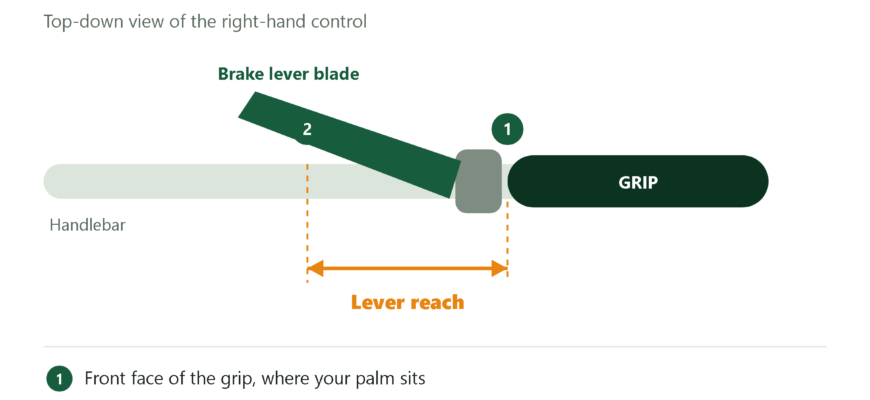
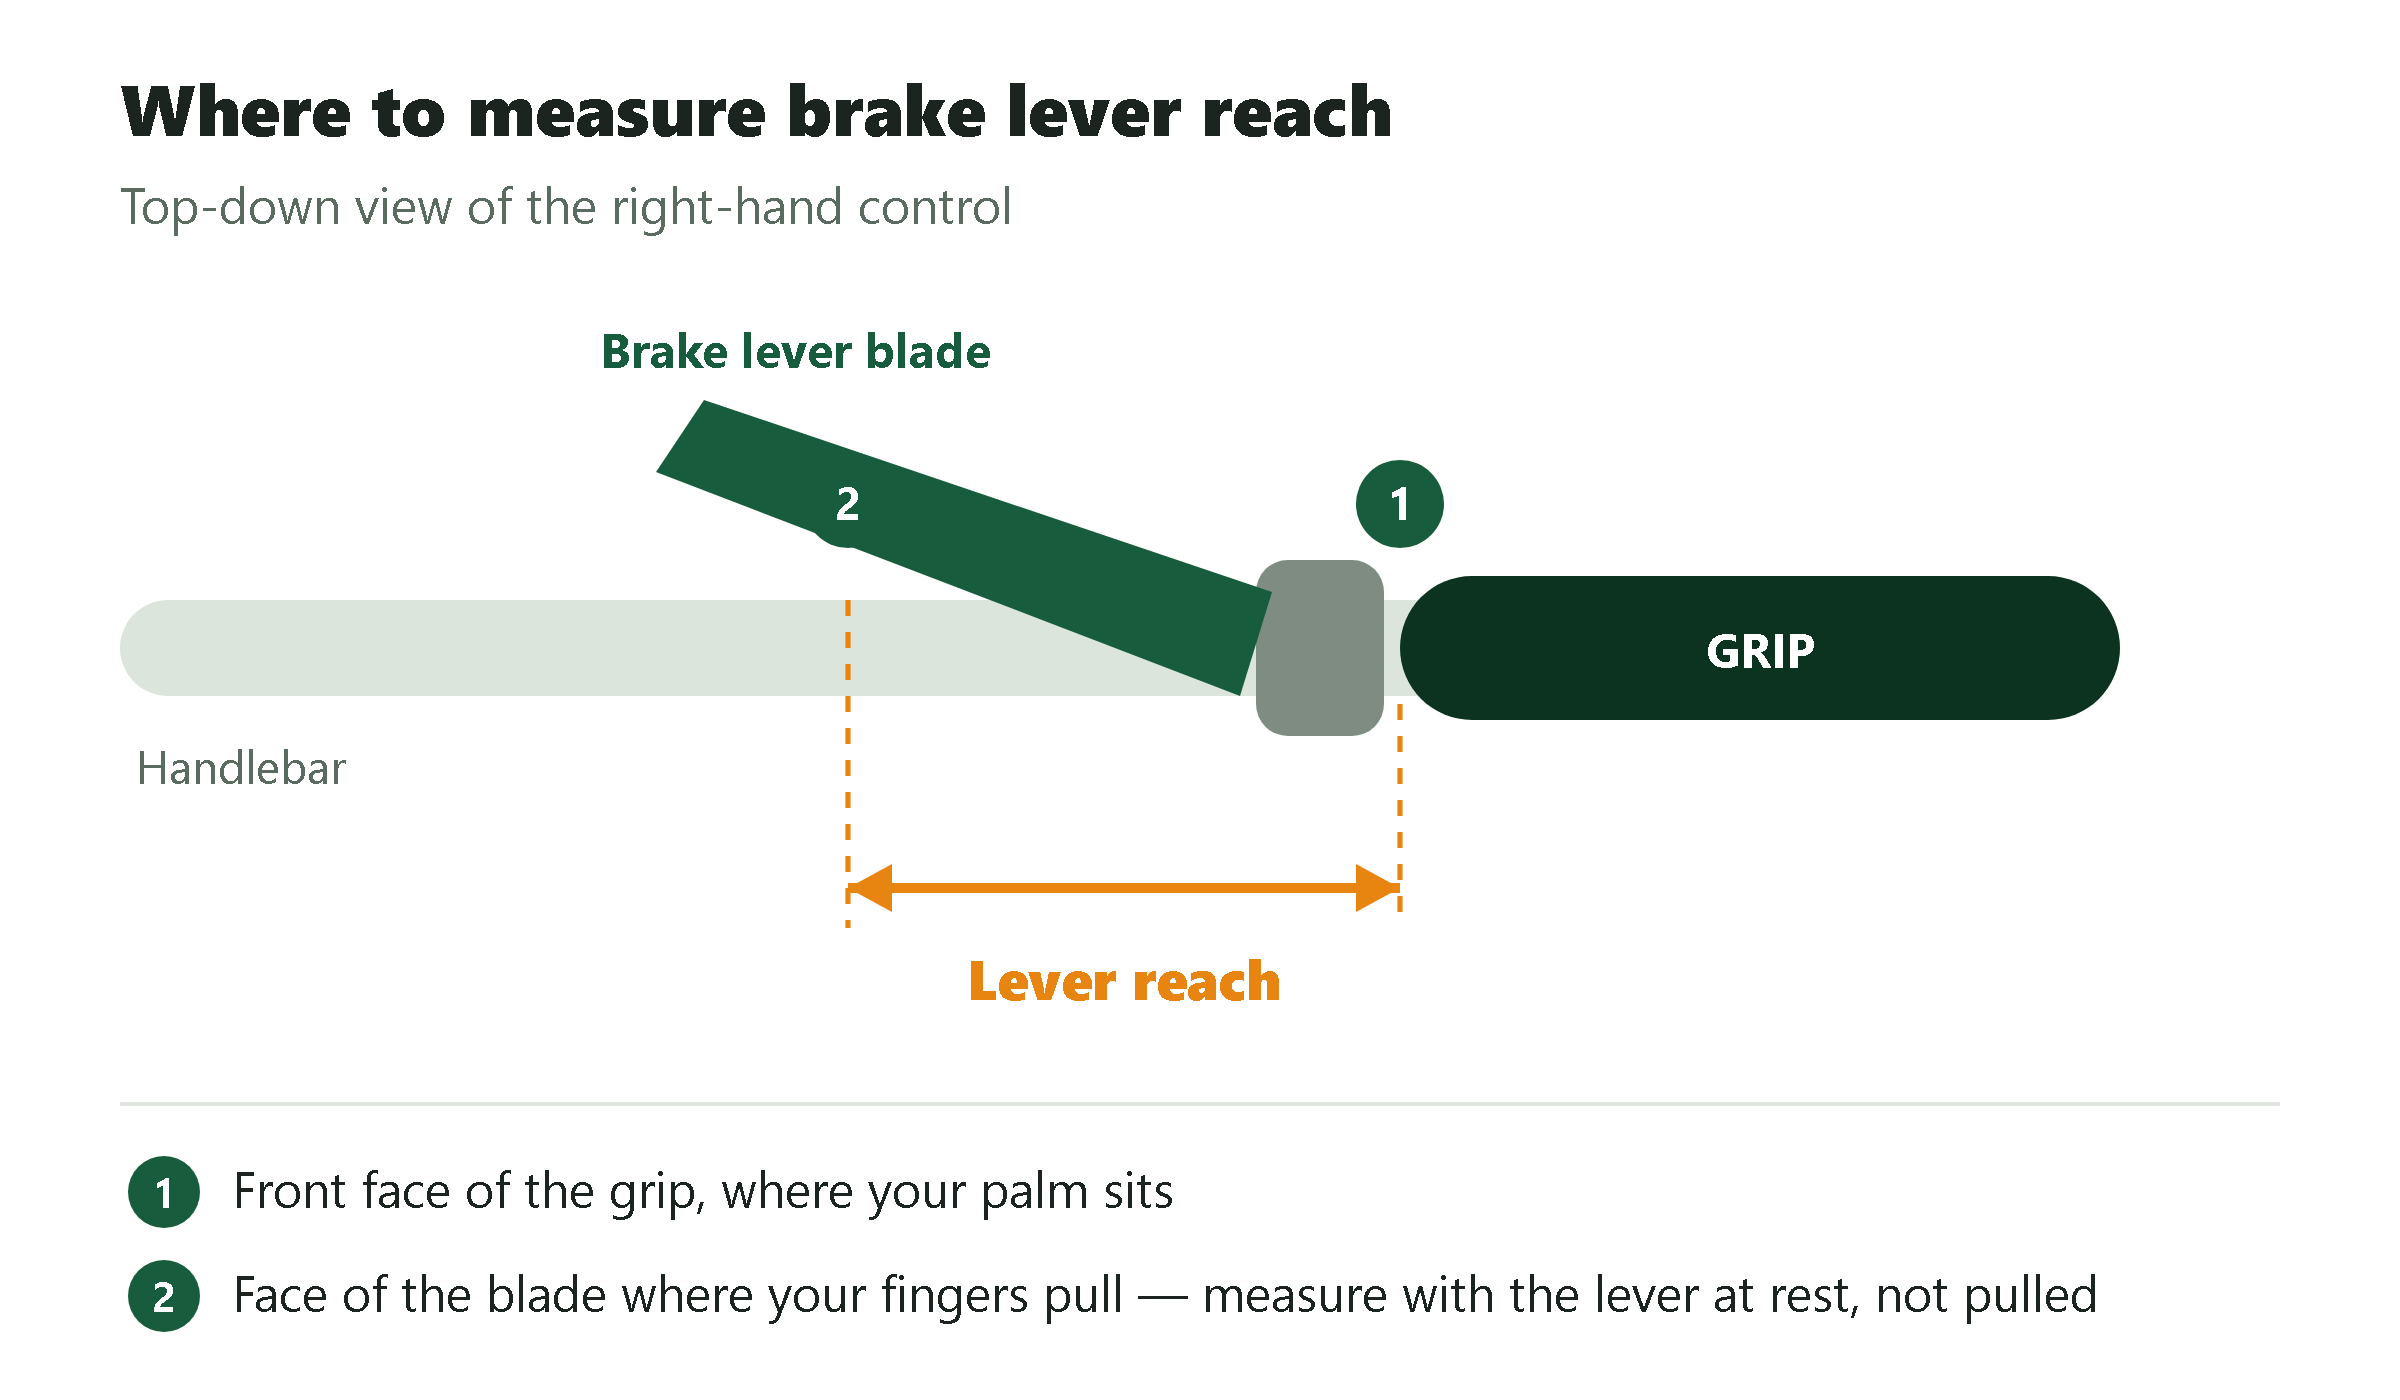
- Measure the straight-line distance from the front face of the grip to the front face of the lever blade, where your index finger naturally lands.
- Pull the lever to its firmest point and measure again — that second number is where your finger must hold under force.
| What you observe | What it means | What to do |
|---|---|---|
| Finger bent at the first knuckle on the blade | Reach suits your hand | Nothing — check both sides match |
| Finger nearly straight to touch the blade | Too long: fingertip braking only | Turn the reach screw in, or fit short-reach levers |
| You slide your hand off the grip to reach | Unsafe: cannot brake and hold the bar at once | Adjust or replace before riding it |
| Blade hits grip or fingers before full braking | Too short: you run out of travel | Back the screw out; on mechanicals check cable tension and pad wear |
| One lever feels different from the other | Uneven braking under stress | Set both to the same measured reach |
Take these numbers with you when you shop. Our test ride checklist for short riders covers what else to check before you commit, and how to measure yourself for an e-bike covers the body measurements that decide frame fit.
Where lever reach fits in the whole fit picture
Adjust in this order: saddle, then bar position, then levers. Lever reach comes last because it depends on everything upstream — move the saddle or bars afterwards and you will redo it.
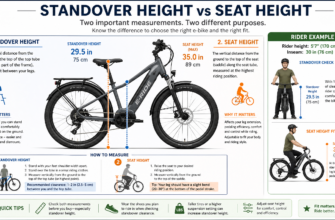
It also cannot rescue a frame that is simply too big. If you cannot stand over the bike flat-footed, no lever tuning makes it safe — see why standover and seat height numbers mislead short riders. Get the frame right first, work through how to adjust an e-bike for short rider fit, and finish with the levers.
Frequently asked questions
Do all e-bike brake levers have reach adjustment?
No. Many hydraulic levers include a reach-adjust screw or dial, but plenty of budget levers — particularly basic mechanical disc levers — have none. Manufacturers almost never state this on their spec pages, so you cannot confirm it before buying without asking the seller directly or inspecting the lever in person.
Is it safe to brake with one finger?
On well-set-up hydraulic disc brakes, one or two fingers is normal and keeps the rest of your hand on the bar. The problem is not the number of fingers, it is where they sit. One finger with a bent knuckle on a properly positioned blade is strong; two fingers stretched straight to a distant blade is weak.
Will shorter levers reduce my braking power?
No — properly matched short-reach levers are designed to deliver the same braking force within a shorter finger stretch. What genuinely reduces braking power is a lever you can only reach with your fingertips, because you lose the leverage and the ability to squeeze hard and hold. Correct reach increases usable braking power, it does not reduce it.
Can I swap the brake levers on my e-bike myself?
Mechanical cable levers are a straightforward home job. Hydraulic levers usually require bleeding the system and matching the brand, so most riders should use a shop. On any e-bike, first check whether the lever carries the motor cut-off switch — losing that feature is a real safety downgrade, so confirm the replacement includes it.
Does grip thickness affect brake reach?
Yes, and it is one of the cheapest fixes available. A thinner grip lets a small hand close further around the bar, which shortens the distance your fingers travel to the lever blade and improves how securely you hold on. Swapping grips costs little and can be done alongside a reach adjustment for a compounding effect.
Model specifications cited above come from each manufacturer’s published product pages, checked July 2026. tonimoto.com compares published specifications and fit geometry; we do not conduct physical brake testing. Prices and specifications change — verify with the manufacturer before purchase.